Saturday, July 30, 2011

Too Many Tomatoes...

What else do you do with home grown tomatoes other than make tomato sauce?!? My mother is a hard core gardening fanatic. She brings me tomatoes EVERY weekend. I have now ended up at least a dozen tomatoes and I need to use them! One of the easiest recipes I found was from Smitten Kitchen

However, we like our sauce with a kick! I added some sriracha to spice things up a bit and give it some heat. I made some of my own changes and modified the recipe below.

Yield: About 4 cups sauce


3 pounds tomatoes (any kind will work)
1/4 cup olive oil
2 to 3 small cloves of garlic (chopped)
1/4 cup of white wine
1/2 teaspoon salt plus more to taste
2 tsp dried Italian seasonings
1 tbsp Sriracha (optional)
Fresh basil, to finish


Peel your tomatoes: Bring a pot of water to boil. Blanche the tomatoes in the boiling water for 10 to 30 seconds, then either rinse under cold water or shock in an ice water bath. This will make it super easy to peel the tomatoes. 

Once they are all peeled, quarter them and squeeze the seeds out over a bowl. (Keep the juice just in case you need to add a little bit later.) Chop the tomatoes into chunks.   


Heat the olive oil in a large pot over medium heat. Add the garlic and onions and cook until they are translucent. Add your tomatoes and bring to a simmer, lowering the heat to medium-low. I don't like my sauce chunky, so I used an immersion blender to thin it out a bit. You could also use a potato masher. Add in the basil, seasonings, and salt and pepper. Simmer for about 15 minutes and then add the white wine and sriracha.


Continue to let your sauce simmer, stirring occasionally. After about 35 minutes you'll have a delicious pot of tomato sauce! Note: the longer you let it simmer the more concentrated the flavors get. 
My taste tester! :)

Monday, July 25, 2011

Meatless Monday

Foodista is an awesome website that posts vegetarian recipes every Monday. Be sure to check this one out...it's tasty!
 
Pesto Manicotti
Ingredients:
15 oz ricotta cheese
1 box of manicotti noodles
1 bag fresh baby spinach
1/2 medium onion (diced)
1/2 tsp garlic powder
2-3 cloves of garlic, minced
1 cup shredded parmesan cheese
2-4 tbsp of pesto (Store bought would work but I like to make my own, so I have also added that recipe!)
1/2 cup shredded mozzarella cheese
seasonings: black pepper, salt, parsley, oregano, thyme & garlic powder.
16 oz marinara sauce (Store bought or homemade)

Spinach and Basil Pesto
Ingredients:
1 bag fresh baby spinach
1 cup fresh basil
1/3 extra virgin olive oil
1/4 toasted pine nuts
1 cup shredded parmesan cheese
2 cloves chopped garlic
salt and pepper to taste

*In a food process combine all ingredients until well blended. It's that easy! :)

Directions:
Preheat oven to 350 degrees.  

Gently boil shells for about 11-13 minutes or until tender. Drain & arrange cooked noodles in a glass baking dish with a thin layer of marinara sauce on the bottom.

Saute the onions and garlic in 1/2 tablespoon of extra virgin olive oil until tender. Add salt, pepper, oregano, thyme, and garlic powder. Remove from heat.

In a large bowl, fold ricotta, parmesan cheese, pesto, and spinach together. Next, add the onions and garlic to the mix. Stuff the noodles gently and pour the rest of the marinara sauce on top. Sprinkle the top with mozzarella cheese and bake for approx 20-30 minutes.


Friday, July 22, 2011

Peanut Butter, Caramel, and Chocolate, OH MY!

This recipe was inspired by Food Network's new show called Tough Cookies. This woman is absolutely hilarious! The show is about two sisters, Susan and Linda, that own their own cookie bakery in New Jersey. Here's a synopsis on the episode that inspired this recipe:
"It's the biggest event of the summer for Crazy Susan's - the Ocean City Block Party...and Susan is nowhere to be found, which creates an extremely stressful morning for Linda and her army of family members pitching in to make 5000 cookies for the event. Since she's delayed, and out of necessity, Susan has Stephanie take the reins, and gets her first chance to start baking. Susan is inspired to create a special cookie just for the mayor, to present to him at the block party and devises her interpretation of a "Moose Tracks" cookies." - Food Network
And so it begins...after seeing her create those cookies I decided to make some of my own with a twist! I decided to make brownies instead of cookies. I really like chewy and fudgy brownies, so I thought this would be a great combo to substitute. The original browning recipe is from Cookie Madness. This is what I came up with:

Candy Bar Brownies

Ingredients
  • 6 tbsp butter, melted
  • 2 eggs, lightly beaten
  • 1 cup sugar
  • 1 tsp vanilla extract
  • 3/4 cups all-purpose flour
  • 1/4 tsp baking powder
  • 1/4 tsp salt
  • 2 tablespoons plus 2 teaspoons unsweetened cocoa powder
  • 1 12 oz package of Reese's peanut butter cups (chopped)
  • 1 12 oz package of Rolo chewy caramels (chopped)
Preheat oven to 350 degrees. Grease a 13x9 baking pan with cooking spray.

Mix eggs, sugar, melted butter and vanilla together in a bowl until combined.
Sift flour, baking powder, salt, and cocoa powder together and then stir into the sugar mixture. Toss half of the Reese's and Rolo pieces with flour and then stir into batter. (This will keep the candy pieces from sinking to the bottom of the brownies.)


Pour mixture into pan and bake for 20 minutes. Remove pan from oven and sprinkle top with the remaining 1/2 candy bars.


Return to oven and cook for 5 more minutes. Remove from oven and cool on a rack then transfer to refrigerator and chill. When brownies are cold, cut them into squares. 


These are so yummy and you should go out and make them right away. DO IT! You won’t be sorry. And neither will all of the people who get to enjoy them!! 

Thursday, July 21, 2011

Cake Pops!

I've always had a passion for cupcakes...but I have recently fallen in love with cake pops! I had my first cake pop when I was in Raleigh, NC with my friend Rachel. We walked into Starbucks and there they were. I had heard about this craze, but I had no idea what I was missing. We had the birthday cake flavored pop (middle) and it was amazing!


From then on I was determined to make these little bites of heaven. I made my first batch of cake pops for 4th of July. I decided to do a basic chocolate cake with peanut butter frosting.  


My go to site for a recipe and ideas was Bakerella. She is the cake pop queen! Mine aren't anywhere near as cute as hers, but after a few attempts they turned out delicious! And, they did get many rave reviews, which makes me think I’m definitely on the right track. After you eat one, it really won't matter what it looks like!
I'm always looking for an excuse to make these and I now have another reason to make cake pops! My brother-in-law's birthday is this weekend and I have decided to make red velvet pops with cream cheese icing. There are endless possibilities combining different flavored cake and icing. I can't stop thinking about all the different flavors I could make!

This recipe is based on a boxed cake mix, but you can follow the same directions by making a cake from scratch. (I didn't have time for all that!) I did make my own cream cheese frosting and I've added the recipe below.

Red Velvet Cake Pops
Ingredients
  • 1 box red velvet cake mix (cook as directed on the box)
  • 1 cup cream cheese frosting (recipe below)
  • 1 package vanilla almond bark or candy melts
  • 1/4 cup vegetable shortening (Crisco)
  • lollipop sticks and wrappers (you can find these at Michael's)
  • Rectangular foam block 
1. Bake the red velvet cake according to the directions on the box or your recipe. Be sure to let the cake cook completely. 
While the cake is in the oven start making your cream cheese frosting.
Cream Cheese Frosting

Ingredients:
  • 1 (8 oz) package cream cheese, softened
  • 1 cup sifted confectioners' sugar
  • 1 tsp vanilla extract
  • 1/2 tbsp milk 
2. In a large bowl, beat the cream cheese with an electric mixer. With the mixer on low speed, add the powdered sugar a little at a time until smooth and creamy. Beat in the vanilla extract and milk until it is a smooth and creamy consistency.

3. Once the cake is completely cool, crumble the cake with 2 forks or better yet, your hands!

4. Stir in the frosting to create a smooth cake mixture.  It should look like the huge cake ball below.

5. Roll into balls and place on cookie sheet. You should get about 25-30 cake balls. Place them in the refrigerator for 20-30 minutes.

6. Melt the chocolate candy melts in the microwave according to package directions. This is where the Crisco comes into play. If the chocolate is too stiff if won't coat the cake balls and it will turn into a big mess. (I speak from experience!) I add a little shortening at a time until the chocolate is really smooth and silky.

7. Poke holes into cake balls about half way through with lollypop stick. Dip stick into melted chocolate and press into cake ball. Return to fridge for 5 minutes. Dip cake balls into chocolate and gently tap to remove any extra. Bakerella posted a great video that has step by step instructions.


8. Add some sprinkles or other decorations while chocolate is still soft. Put them back in the fridge for 10-15 minutes to harden. I use the foam to stick the pops into while they are setting.


YUM!! ENJOY! :)

    Wednesday, July 20, 2011

    Nutella Pretzel Bars

    My search for nutella infused food continues...I stumbled upon this yummy recipe on one of my absolute favorite sites: Gojee.com
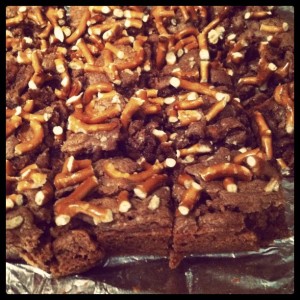
    I love the combo of sweet and salty and the crunchy pretzels with the creamy nutella is perfection. The best way to eat these is warm out of the oven with a huge scoop of vanilla ice cream. AH-MAZING!
    The original recipe can be found at: Dula Notes
    Recipe:
    Makes about 16 bars.

    • 8 tbsp. (1 stick) butter, melted, plus more for greasing the pan
    • 1/2 cup packed brown sugar
    • 1/4 cup granulated sugar
    • 1/2 cup Nutella
    • 1 large egg
    • 1/2 tsp. vanilla extract
    • 1 cup all-purpose flour
    • 1 tsp. salt
    • 1 cup crushed pretzels (broken into small pieces)

    Preheat oven to 350 degrees. Line an 8x8 baking pan with a sheet of parchment leaving a 2″ overhang on both edges. Butter parchment.

    In a large bowl, whisk butter, brown sugar, granulated sugar, and Nutella until it becomes smooth. Whisk in the egg and vanilla. Add flour and salt; mix just until moistened (do not over mix). Fold in 1/2 cup of crushed pretzels. Transfer batter to prepared pan and spread in an even layer with a spatula. Sprinkle evenly with remaining 1/2 cup of crushed pretzels.

    Bake until top is golden brown and a toothpick inserted in the center comes out clean. It should take about 20-30 min. Set pan on a wire rack and let cool completely. Using parchment overhang, lift bars from pan and transfer to a cutting board. Cut into squares. Store in an airtight container at room temperature for up to 2 days.

    My Obsession: Nutella

    In May of 2009 I had the opportunity to travel to Australia for a study abroad program. This is where I fell in love with Nutella. I honestly don't know how I ever lived without it. I have tried it on pretty much everything: toast, pancakes, bagels topped with bananas, graham crackers, peanut butter and nutella sandwiches, pretzels, a topping for ice cream with pecans...you name it, and I'll probably put Nutella on it. So I've decided to create anything and everything with this amazingly delicious hazelnut spread.
    My first attempt at baking with nutella turned out to be pretty interesting. I wanted to incorporate nutella into a yummy, buttery, cookie. So that's what I did. The result: Nutella Pinwheel Cookies

    I got the original recipe from The Purple Foodie and it's definitely a keeper!
    This recipe doesn't require a lot of ingredients to get such delish results.  I’ll definitely be making them again.


    Nutella Pinwheel Cookies
    Ingredients:
    • 8 Tbsp. (1 stick) butter at room temperature
    • 1/2 cup sugar
    • 1 egg yolk
    • 1 tsp. vanilla extract
    • 1 cup of sifted flour (You might need a little more to make sure the dough comes together.)
    • 1/4 cup Nutella (I didn't really measure this, I figured it wouldn't hurt if I added a little more!)  
    • 2-3 Tbsp. toasted and chopped hazelnuts  (I left this out because I didn't have any.)
    Directions:
    Preheat oven to 350 degrees.Mix the butter and sugar together until it's creamy. Add in the egg yolk and vanilla extract until well combined. Stir in the sifted flour.


    Roll the dough into a ball and cover it in plastic wrap. Refrigerate dough for 20-25 minutes so it's nice and firm and easy to roll out.Remove dough from refrigerator and roll into a rectangle about 1/4″ thick.


    Spread Nutella on top of dough, leaving about 1/2 an inch width around all the edges. Sprinkle with toasted hazelnuts, if you are using them. Roll dough into a log lengthwise and return to refrigerator for another 15-20 minutes.


    Cut slices from dough and place on an ungreased baking sheet. A word of advice: The Purple Foodie recommends using floral wire to cut the cookie log. You can also use dental floss. (My dentist would be so proud!) Or you can certainly use a knife to slice the cookie log, but it will mess up your perfect nutella swirl. The dental floss worked perfectly for me!


    Bake for 10-12 minutes until they are slightly golden brown. Watch for the edges to begin to color and remove from oven. Let them cool for about a minute or so before transferring them.


    I got about 25 cookies out of this recipe. 

    Hello World!

    So, I have recently decided that it would be fun to start a blog to create a compilation of my all time favorite recipes. Some of these recipes have been adapted from professionals, and some are just crazy ideas I came up with. All in all, they have turned out to be quite scrumptious.