Thursday, June 6, 2013

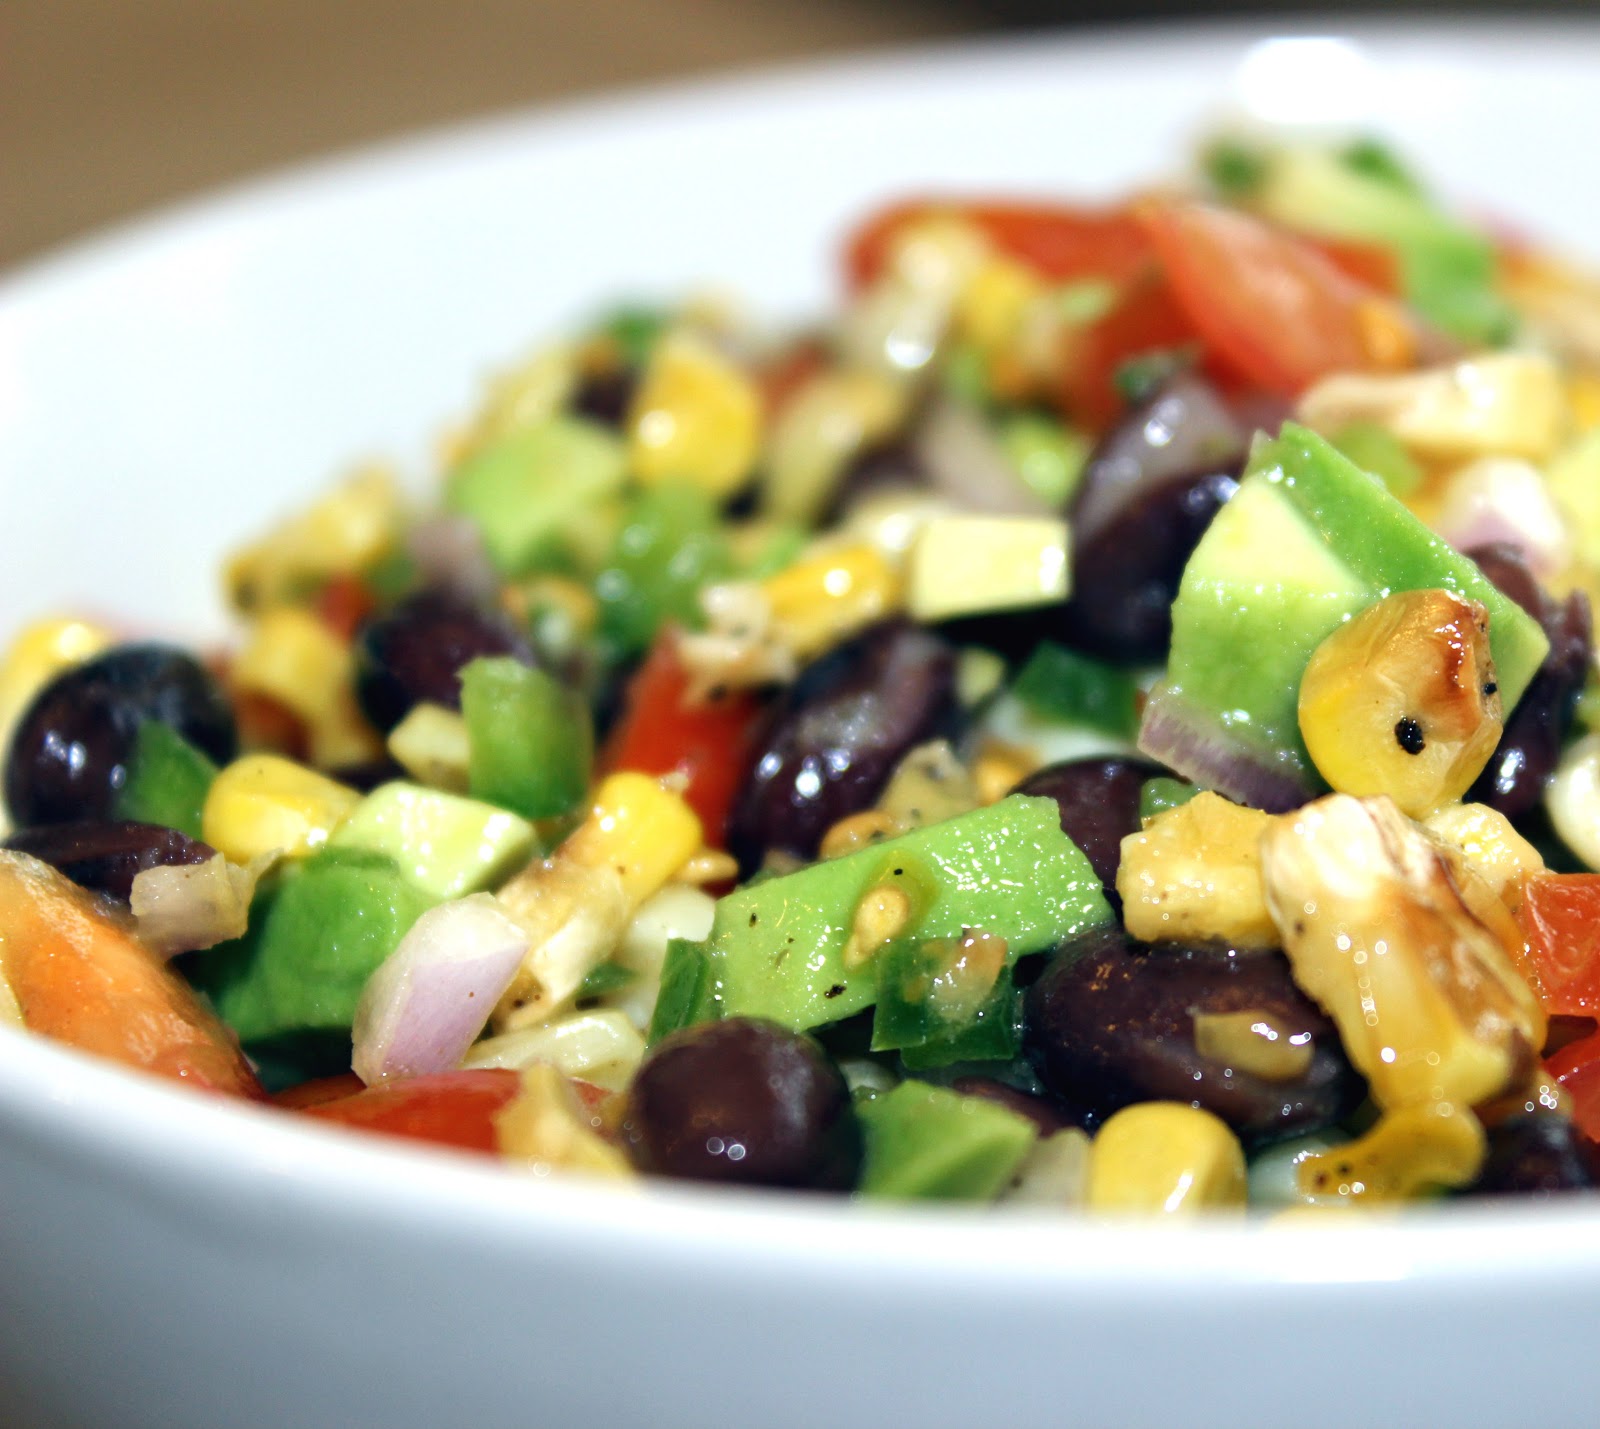
Roasted Corn and Black Bean Salsa with Honey Lime Vinaigrette

This is a very easy salsa that you toss in a honey lime vinaigrette. It's light, refreshing, and perfect for a summer cookout!
It doesn’t even need to marinate in the fridge. It’s perfect and delicious served at room temperature with tortilla or pita chips, on top of tacos, or straight out of the bowl with a spoon!
The sweetness from the honey and the heat from the jalapeno pepper is the perfect combination. It’s not crazy spicy...just really good!

Roasted Corn and Black Bean Salsa
Recipe adapted from Jehan Can Cook
Ingredients:
2 garlic cloves, minced
1/2 teaspoon honey
3 tablespoons olive oil
Juice from a lime
3 ears of corn, husks and silk removed
1 can black beans, rinsed and drained
2 tomatoes, seeded and chopped
1/4 cup diced red onion
1 ripe avocado, diced
1 jalapeno, diced

Directions:
  • Remove husks from corn and grill over medium heat for 10 minutes. The corn should have some brown spots and be tender. Turn frequently. Remove and let cool.
  • In a small bowl or jar; add the lime juice, garlic, honey and olive oil. Shake and set aside.
  • Run a sharp knife down the cob to remove as much of the corn kernels as possible. Add the corn into a large bowl. Next add in the diced tomato, onion, black beans, avocado, and jalapeno. Give that a light toss and add the vinaigrette. Stir well until combined and serve cool or at room temperature.

Saturday, June 1, 2013

Whole Wheat Pita Pizza


We loooove pizza. This recipe is the perfect size for a personal pizza and it's a much healthier alternative to the homemade pizza we usually make.

This recipe reminds me of when my mom used to make us little pizzas using naan as the crust...it was so good! There’s something about a whole wheat pita that just gives such a great texture and hearty flavor to the pizza crust...and it's very filling!
The best part about this entire recipe is that it literally took me about 15 minutes to make. Quick and easy?? Yes, please. This one is definitely a winner!

Whole Wheat Pita Pizza
Recipe adapted from Whole Living
Ingredients:
4 whole-wheat pita breads
4-5 sun dried tomatoes in oil, chopped
1/2 cup grated mozzarella cheese
fresh basil, finely chopped 

Spinach and Basil Pesto
Ingredients:
1 bag fresh baby spinach
1 cup fresh basil
1/3 cup extra virgin olive oil
1/4 cup toasted pine nuts
1 cup shredded Parmesan cheese
2 cloves garlic, chopped
salt and pepper to taste

Directions: 
For the pesto:
Combine all ingredients in a food processor until well blended. It's that easy! :)
 
To assemble the pizzas: 
Arrange pita breads on two baking sheets. Spread about 4 tablespoons of pesto on each. Scatter chopped sun dried tomatoes on top, and then sprinkle with the mozzarella cheese. Sprinkle fresh basil on top. Transfer the baking sheets to the oven, and bake the pizzas until the mozzarella has melted, about 20 minutes. Remove the pizzas from the oven, and transfer to a cutting board. Cut each pita pizza into wedges and serve!

Thursday, May 30, 2013

DIY: personalized wreath

This wreath is perfect for a beautiful spring day! It was a super simple, inexpensive DIY project that's easily personalized - you could use any colors or flowers. I'm sure you have already seen wreaths like this are all over Pinterest and Etsy!

Teach. Craft. Love. is where my inspiration came from. 

I love the spring-y look with the flowers and colors. I decided to create one that was a bit more personalized with our last name instead of our address.


I bought all of the materials at Hobby Lobby. I already had the flowers, hot glue gun, and twine on hand, so I just had to buy the wreath, ribbon, the letter, and some paint. (Be sure to use your 40% off coupon!)

Here's your list of items:
  • wreath
  • wooden letter or numbers
  • paint
  • hot glue gun
  • wire cutters 
  • twine
  • burlap ribbon
First, you'll want to paint your letter/numbers. I decided to go with a bright green to match the green color in the flowers. I used spray paint, but you could also use just regular craft paint. Make sure you let it dry for at least an hour. 

Next, using the wire cutter to cut the stems off of the flowers, leaving about 1/2 inch of stem to glue into the wreath.

Decide how you want the wreath to look so you can predetermine where the flowers and letter/numbers will go.

I decided to add a little bit of extra detail with the twine. After I decided where my letter would go, I wrapped about 24 inches of twine around the wreath, hot gluing the twine as I wrapped it. You just want to make sure you end up with the twine on the back.

Next, add some hot glue to the tip of the flower and around the stem and press it into the wreath. Repeat with the rest of the flowers.

Next, glue the wooden letter/numbers on. Carefully lay the letter where you want it to go. Squeeze a line of hot glue on the surface of the back of the letter, then press. If you are using numbers, you'll repeat this step for each one.

Finally, you'll need about 12-14 inches of burlap ribbon. Just tie it around the top into a nice big bow. 

Be sure to let your wreath dry for a few hours...and then it's ready to hang!

Super cute and super easy!

Wednesday, May 22, 2013

Asian Quinoa Salad

I made this salad a few weeks back and can’t wait to try it again! We've just recently started eating quinoa, and this was the perfect salad to add to our dinner. 
The best part is that the quinoa is cooked in vegetable broth with fresh ginger, orange zest and orange juice, giving it this amazing flavor! Just throw in some veggies, almonds, and a delish dressing with honey and sesame oil and you have one incredibly satisfying salad. I’m glad I made enough for lunch...it tasted even better the next day! 

Asian Quinoa Salad
Recipe adapted from The Fig Tree
Ingredients:
1 and 1/2 cups of low-sodium vegetable stock
1 cup of uncooked quinoa, rinsed and drained
2 tablespoons of freshly grated ginger (divided)
1 teaspoon of freshly grated orange zest
juice of one small orange
2 tablespoons of rice wine vinegar
1 tablespoon of olive oil
1 tablespoon of sesame oil
1 tablespoon of honey
2 tablespoons low sodium soy sauce
1 cup of edamame; shelled
2 cups of broccoli slaw
1 cup of sliced almonds, toasted
1 tablespoon toasted sesame seeds

Directions:
1. Place the vegetable stock, 1 tablespoon of grated ginger, grated orange zest, orange juice and rinsed quinoa in a medium sauce pot. Bring to a boil. Once boiling, reduce heat to a simmer and cover the pot. Cook the quinoa for 10 minutes.
2. Meanwhile, mix the rice wine vinegar, other tablespoon of grated ginger, olive oil, sesame oil, honey, and soy sauce in a small glass jar or container. Shake to combine.
3. After the quinoa has cooked for 10 minutes, turn off the heat. Toss in the edamame, and broccoli slaw. Return lid to pot and allow the veggies to steam with the quinoa for 5 minutes. Remove lid and allow mixture to cool to room temperature.
4. Toss the quinoa mixture with the salad dressing. Add in the sliced almonds. Garnish the salad with sesame seeds. Serve at room temperature.

Sunday, May 19, 2013

Peanut Butter Oreo Brownies

Oreos AND peanut butter wrapped up in a brownie...this is crazy good! I've been kind of obsessed with peanut butter lately, so when I saw these at Publix the other day I had to get them. 
This recipe is super simple. Just mix up some brownies, throw in some peanut butter Oreos, pour the brownie mix over the top and bake. Easy!!

Peanut Butter Oreo Brownies
Ingredients:
1 package brownie mix
1 egg
1/3 cup water
1/3 cup vegetable oil
1/2 cup semi sweet chocolate chips
16 peanut butter Oreos

Directions:
  • Preheat oven to 350 degrees. Line an 8x8 inch pan with aluminum foil and lightly spray with cooking spray. 
  • In a large mixing bowl, combine brownie mix, egg, water, oil, and chocolate chips. Mix well. 
  • Pour half of the brownie batter into the lined pan. Gently place Oreos on top of batter. Pour remaining batter over the Oreos. 
  • Bake for 30-35 minutes until brownies are cooked through. Cool and cut into 16 squares.

Sunday, May 12, 2013

Greek Yogurt Peanut Butter Pancakes

OMG! I was in pancake breakfast heaven after eating these. I am telling you, these pancakes are sooo amazingly delicious. Seriously, my mouth is watering right now as I type...  
They are light, fluffy and super peanut buttery.  A little peanut butter maple syrup on top and it is the perfect combination of salty and sweet. The batter for these pancakes is thicker than the usual, but the pancakes still manage to come out fluffy and light...you have to make them!

Greek Yogurt Peanut Butter Pancakes
Ingredients:
for pancakes
1 cup whole wheat flour
1 teaspoon baking powder
1/4 teaspoon baking soda
1 cup nonfat plain Greek yogurt
1 tablespoon honey
1 teaspoon vanilla extract
2 large eggs
3 tablespoons skim milk
1/2 cup peanut butter chips
for syrup
1 cup maple syrup
2 tablespoons all natural peanut butter
1/4 teaspoon vanilla extract

Directions:
In large bowl whisk together flour, baking powder, and baking soda. In a separate medium bowl, beat Greek yogurt, eggs, honey, vanilla, and milk until smooth and well combined. Add wet ingredients to flour mixture and mix together. The batter will be very thick. You can add in a teaspoon or two of milk if you think it's too thick, stir until it is smooth. Next, gently fold in peanut butter chips.

Lightly coat a large nonstick skillet or griddle with cooking spray and place over medium heat. Drop batter by 1/4 cup onto skillet. You may need to use a spoon to spread out the batter just a tiny bit, since the pancake batter will be thick and you’ll want them to cook thoroughly. Flip cakes and cook until golden brown, 2 minutes. Repeat with more cooking spray and remaining batter.
To make the syrup, place maple syrup, peanut butter, and vanilla in a saucepan over medium heat. Wait until mixture begins to simmer, and stir every few minutes. Remove from heat and drizzle over warm pancakes.

Sunday, April 28, 2013

Smash Cake!

Cam is turning 1! Our sweet friends asked me to make a smash cake for Cameron's first birthday party and I was soooo excited! 

As soon as I started my search on Pinterest, I found some of the cutest smash cakes. The one that caught my eye though, was tie dyed! And what kid (or adult) doesn't LOVE sprinkles?!

I wanted to make sure the cake was going to be perfect for the big day...so I made a "practice" cake for the pictures the weekend before.  
Here is where my inspiration came from...
This little cake was made especially for the birthday boy to smash and dig into! Here’s how it works: place baby in highchair, place smash cake on tray, let baby go for it, take adorable pictures! I'm pretty sure this smash cake was a success! :)